|
Start a form |

|

|
|
|
Start a form |

|

|
Start a form
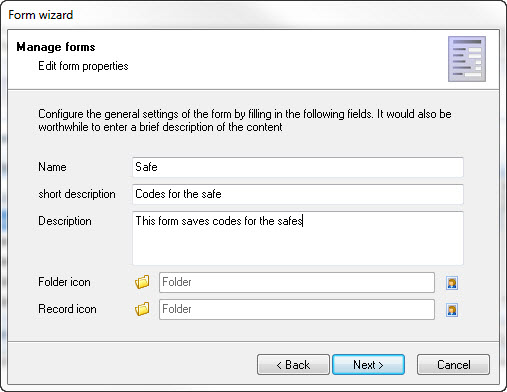
If you want to start a new form, open the form management via edit -> manage forms. Afterwards click on add form to open the form assistant.

After a click on continue you can choose if you want to create a new form or educe from an existing one.

If you decide for the creation of a new form you get directly to the window of the form properties. If you want to educe a form from an existing one you get the possibility before to choose the accordant form. When educing from a form the fields are initialised and can be changed according to your requests. If you create a new form the fields are blank.

Here you have got the possibility to give the form a name and to describe it. Furthermore you can choose the icons for the linked folders and datasets here. In the next window you define the fields of the new form. The field description is contained by default.

Via the push-button upwards and downwards you can change the order of the fields. Via the button add you have got the possibility to integrate new fields to the form.

In the field properties you can define which kind of field it should be. You have got a selection of several types of fields here. The field name is a clear allocation and can only appear once in a form. The field name furthermore serves for the identification of the field, for example at the applications, and scripts as variable name {FRM:field name}.

Field inscription:
Field name: Always has to be clear...
Field type: Different functions according to the type of field
Field type to all number fields (deciaml, number) calculator as a button at the back...
Field type password has got all password functions like show and hide, generatro, clipboard, etc.
Field type ComboBox, new tab, which can be filled with values --> ATTENTION, the order must not be changed if data has already been entered
Field type date -> calendar function
All of them have got the clipboard function...
Description: In the field "description" you can deposit information which is displayed when editing a dataset. For this there are several possibilities:
Description text without icon entry
Just enter a text, this will then be displayed as an information as follows.
![]()
Description text with icon entry
You can also define the icon itself and therefore also change the color of the notice in order to get more attention on the description text. First enter the number of the icon (0 to 3) followed by a semicolon; and afterwards the text that should be displayed.
Information (blue)
0;Describe briefly for what this password is used.
![]()
Tip (yellow)
1;As a user name also the email address can be used.
![]()
Warning (bright red)
2;ATTENTION! Give away a safe password with at least 15 characters.
![]()
Error (dark red)
3;The field should no longer be used.
![]()
Entry mask: Here a set phrase, a "regular expression" can be deposited for a check.
Password guideline: With this option it is made sure that the entered password fulfills the password guidelines.
After you have saved your settings and completed the assistant the new form is available for you.