|
Workflow actions |

|

|
|
|
Workflow actions |

|

|
Workflow actions
|
Workflow actions |

|

|
|
|
Workflow actions |

|

|
This action offers the possibility to export the WebViewer automatically. You can find further information on the WebViewer under WebViewer. Please notice that this export is carried out on the client and can take several minutes according to the client.
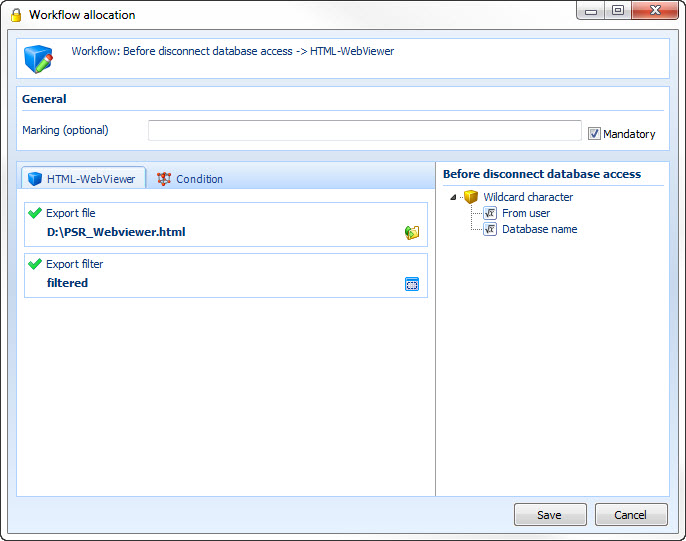
Export file -> Here you can define the memory location
Export filter -> Enter the folder which you want to export here
The export of the HTML WebViewer can also be carried out as a system task on the server. This does not cause any load for the client.
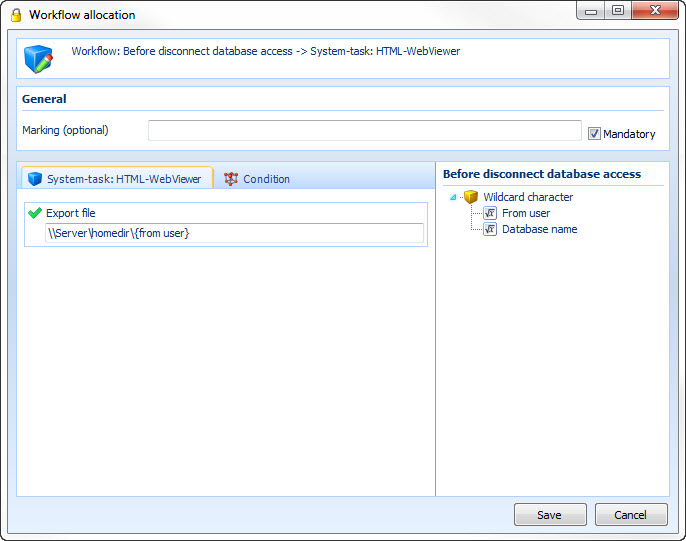
Compared to the action HTML WebViewer there is no export filter field here. All data which the user can access are exported.
In the field export file there is no possibility to choose a folder structure. Here the desired path has to be entered. Please notice that the task runs on the server and therefore the folder structure is based on the one of the server. In this example a dynamic path with the wildcard character from user has been chosen. So every user can carry out the export to his/her personal network share.
Dialogue
This action outputs a dialogue. So for example notices or warnings can be output.
Please notice that you can completely lock yourself out of the function or the event if you choose at after dialogue -> close workflow.
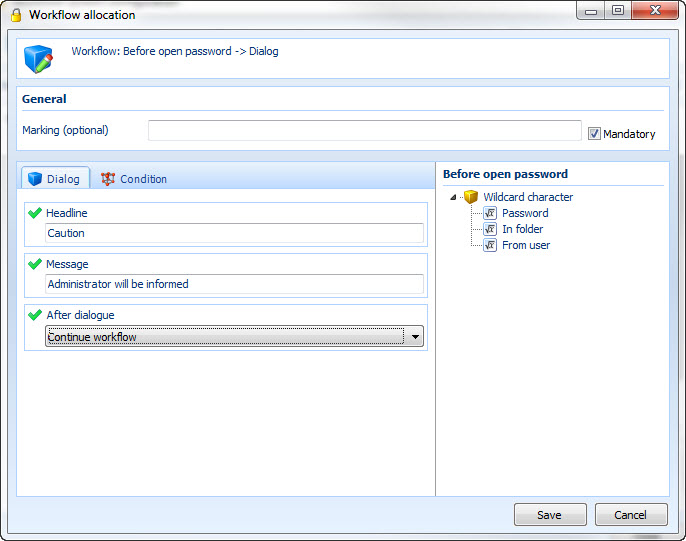
In this example the user will be informed that afterwards another workflow will be started, which informs the administrator on the opening of a password.
Yes/no confirmation
Sometimes it is reasonable to ask the user for approval before carrying out an action. This can be simply realized with this action.
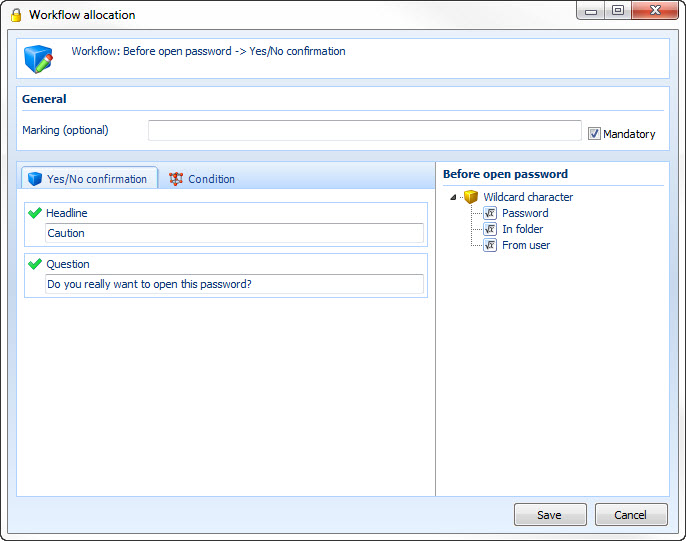
The user will be shown a window in which he/she will be asked if he/she really intends to open a password. If the user clicks on "yes" the workflow will be continued and the dataset will be opened. A click on "no" causes the abort of the workflow.
Enter user password
If you want to protect an object with a user password you can realize that with this action. At this the password does not necessarily have to be from the user logged in, because every user can be chosen.
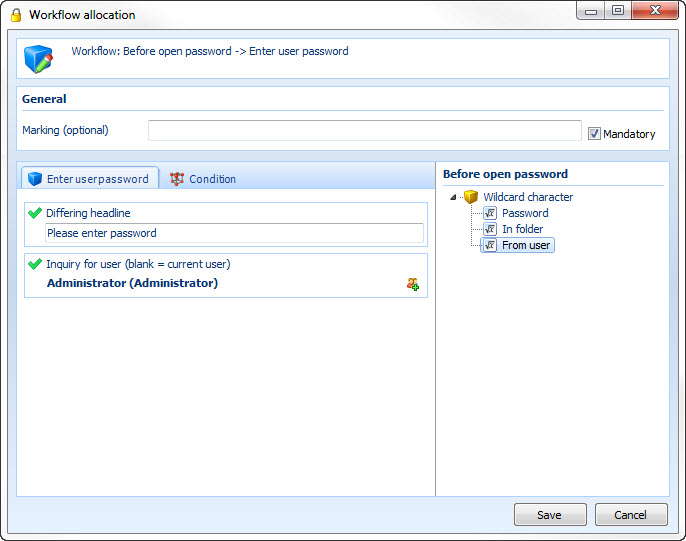
If a user wants to open a certain password it is -due to this action- only then possible, if Mr. Anderson has directly entered his password at the computer.
Event seal
This action gives you the possibility to seal all events which are available in the workflow system. Here the event will be sealed in the moment in which you save the workflow. Here you have got all possibilities which the seal system offers. If the accordant event is opened again after the breaking of the seal you have the possibility to delete the broken seal or set it again. You can find further information on that under seal.
Here you can find an example for the configuration of the seal on a folder: Workflow examples
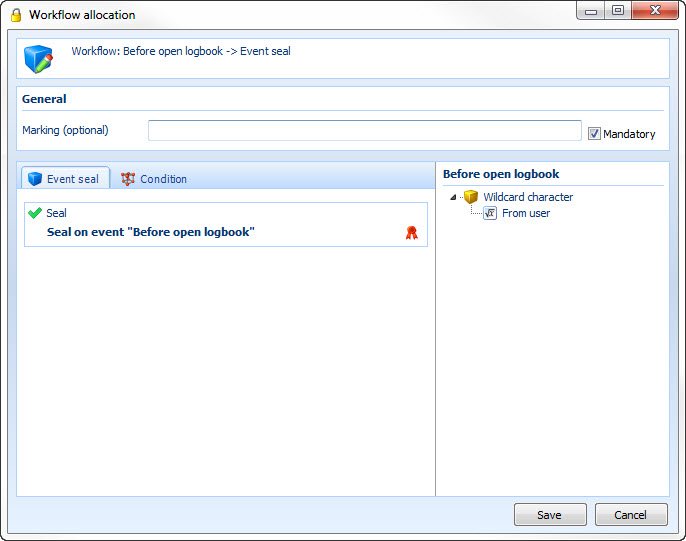
The event open before logbook has been sealed. That means the user has to break a seal first, before he/she can open the logbook. If any releases are deposited in the sealing template, they have to be required in advance. After the seal is broken the user has got exclusive access to the logbook. If the user closes the logbook and opens it again, he/she gets the possibility to seal it again.
Release system
Another possibility to protect events is the use of release systems. You can choose every release which has already been created. Then the user has to require and receive the necessary releases before he/she can carry out the event. You can find further information under Releases
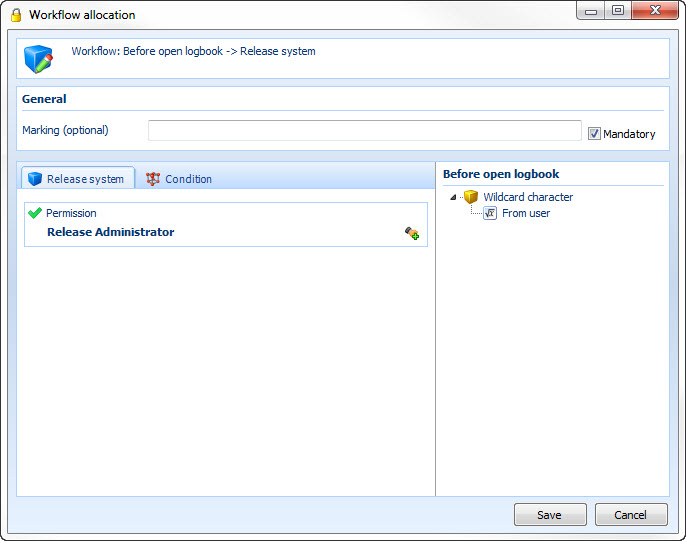
If the user wants to open the logbook he/she has to receive the release from Mr. Anderson first.
Four-eyes principle
Via the several-eyes principle any event can be protected in a way that before carrying out two users have to enter their key words at the computer.

This action causes that Mr. Anderson, as well as any two other users from the group "IT" and any user from the group "It - RDP and licenses" have to enter their passwords directly at the computer.
Note: When the option "Username must match with Windwos logon name" is enabled, the user can´t grant releases. |
Event viewer
An entry in the Windows event viewer is also possible.
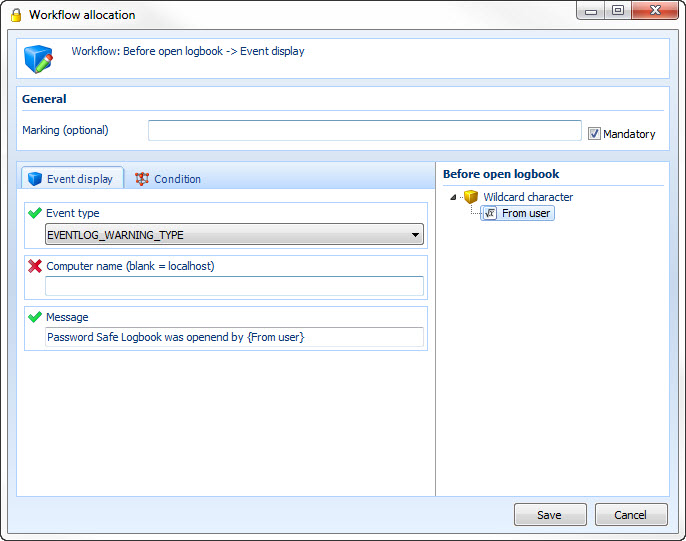
Event type: Here you can choose which event should be entered
Computer name: Define here which event viewer should be entered
Message: Enter the message text here
Internal mail
Of course also internal mails can be sent via the workflow system.
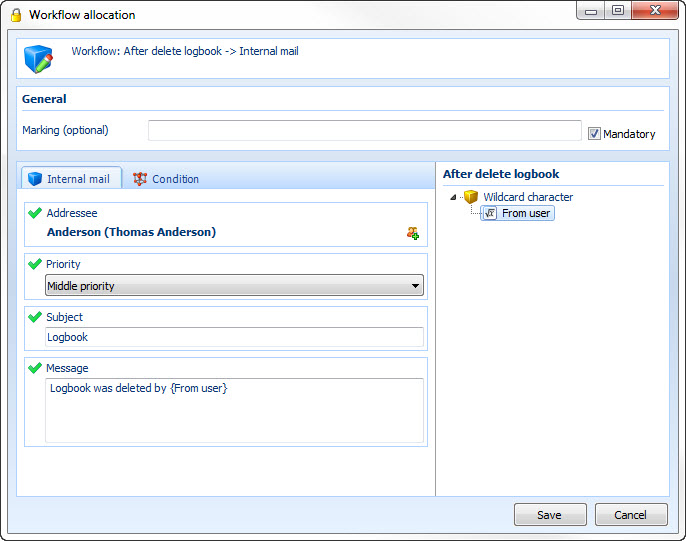
This example sends an internal mail to the user Anderson with the priority "middle". The subject is called "logbook". In the message text the user will be entered.
MAPI mail
One possibility to send emails is the action "MAPI mail". Here the standard email program (outlook, Lotus Notes, Mozilla Thunderbird etc.) as well as a pre-assembled email in it will be opened for the sending of the email. Therefore this messaging function is "potentially" unsafe, because the user could stop the sending of the message in the standard email program.
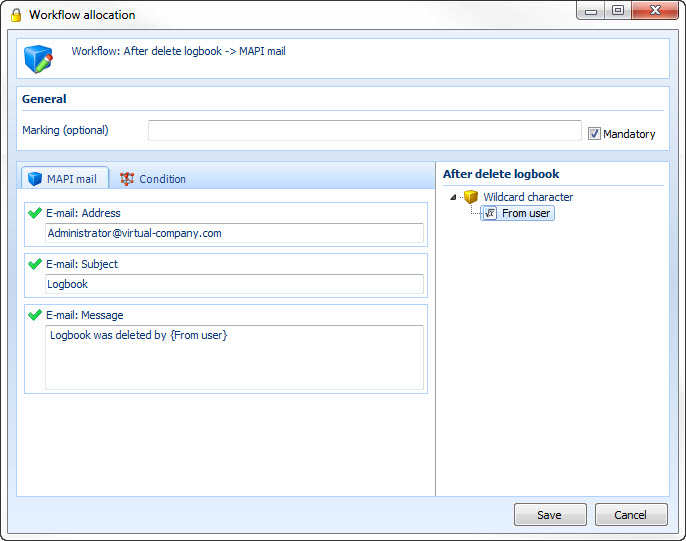
Email address: Enter the receiving address here
Email: Subject: Enter the subject here
Email: Message: You can enter the message text here
SMTP mail
Another possibility to send emails offers the action SMTP mail. Please notice that the sending of the message is only possible if the computer has an internet connection.
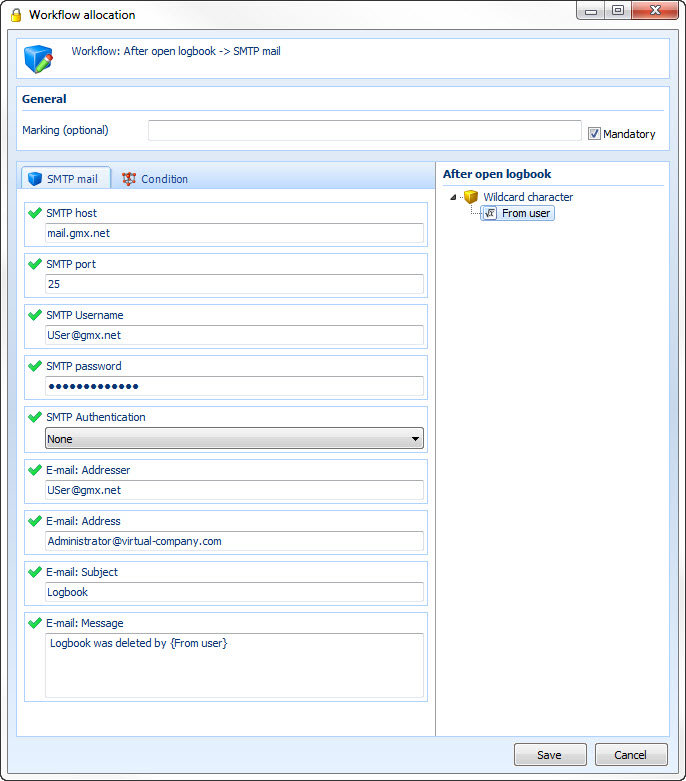
SMTP host: Enter the SMTP server of the return address here
SMTP port: Enter the SMTP port of the return address here
SMTP user name: Enter the user name of the return address here
SMTP password: Enter the SMTP password of the return address here
SMTP authentication: Choose the authentication method of the return address here
E-mail: Addresser: Enter the return address here
E-mail: Address: Enter the receiving address here
E-mail: Subject: Enter the subject of the email here
E-Mail: Message: Enter the message text here
System task: SMTP mail
An email can also be sent as a system task from the server. At this the sending of the message is made via the task service of the Enterprise server. The task will be activated after a configured time, that is why it is possible that the email gets to the users with a certain delay (task service every 5 min. etc.).
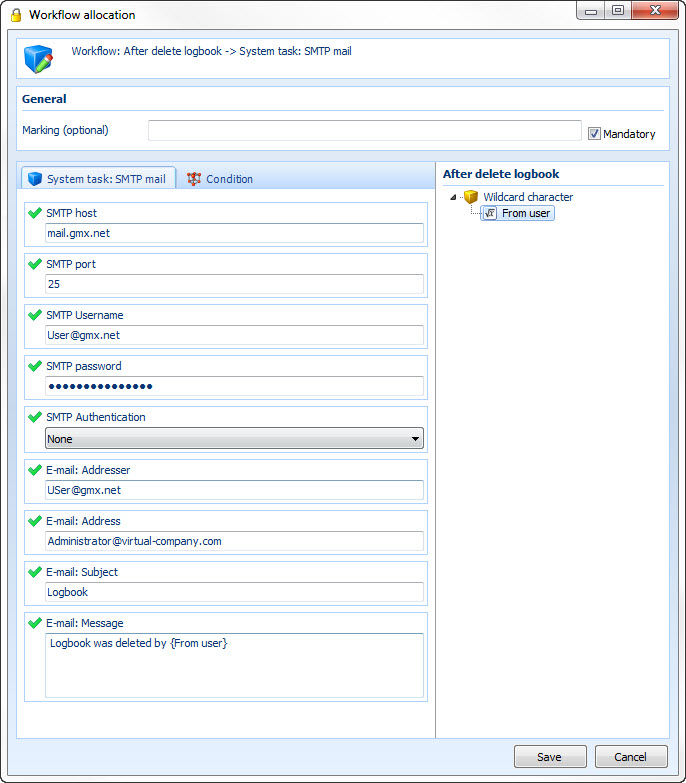
SMTP host: Enter the SMTP server of the return address here
SMTP port: Enter the SMTP port of the return address here
SMTP user name: Enter the user name of the return address here
SMTP password: Enter the SMTP password of the return address here
SMTP authentication: Choose the authentication method of the return address here
E-mail: Addresser: Enter the return address here
E-mail: Address: Enter the receiving address here
E-mail: Subject: Enter the subject of the email here
E-Mail: Message: Enter the message text here
Start application
Via this action applications can automatically be started
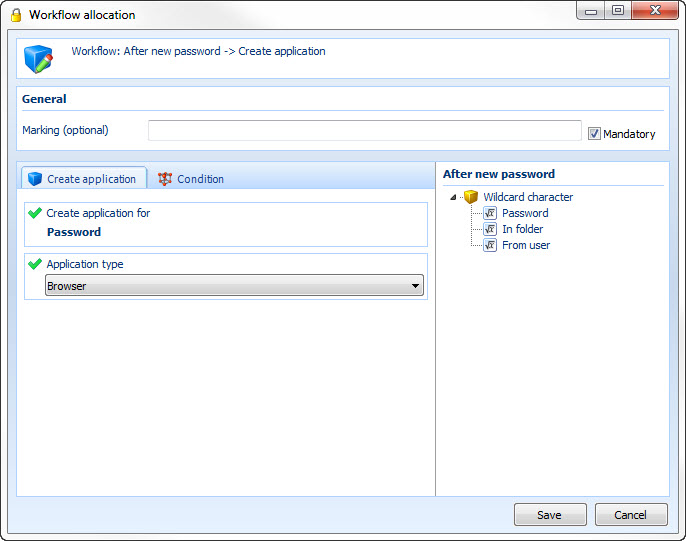
Start application for: Enter the desired wildcard character here
Application type: Choose between automatic, browser and application here
In this example the accordant browser application will automatically created after the setup of a new password.
Dataset seal
This action offers the possibility to set seals automatically
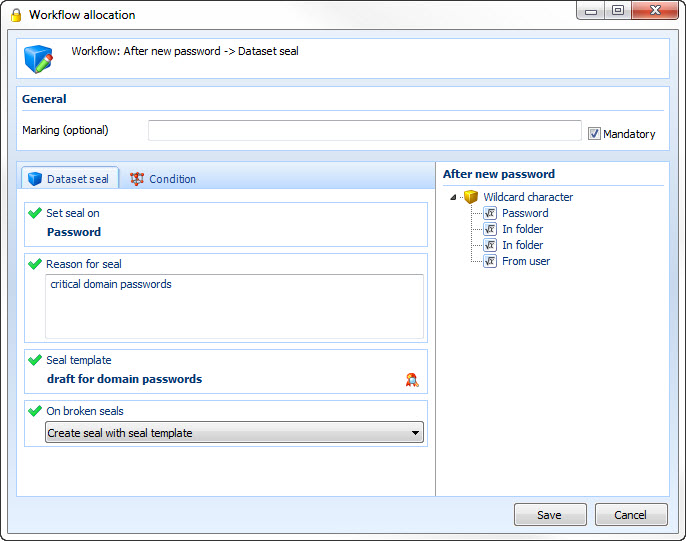
In this example a new password is automatically sealed according to the selected seal template. Via the menu item at broken seal it can be defined if a dataset with a broken seal should be sealed again with the current seal or according to the seal template. There is also the possibility not to carry out any action at a broken seal (not consider broken seal).
Edit rights
There is also the possibility to open a right dialogue via the workflow system
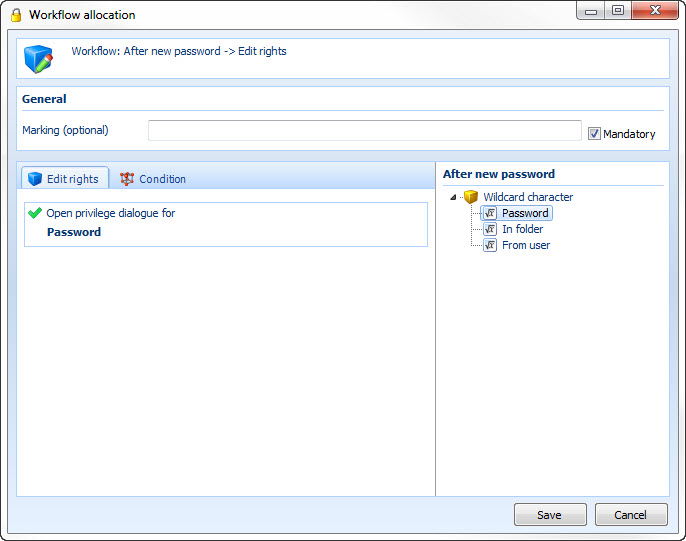
The example opens the right dialogue password after the setup of a new password