|
Creating a form |

|

|
|
|
Creating a form |
|
|
Creating a form
|
Creating a form |
|
|
|
|
Creating a form |
|
|
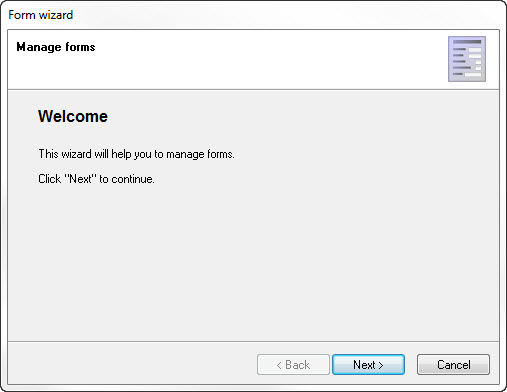
If you want to create a new form, open the form management via edit -> manage forms. Afterwards click on add form to open the form assistant.
After a click on continue you can choose if you want to create a new form or educe from an existing one.
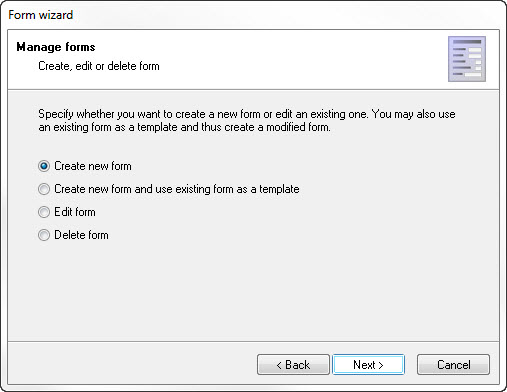
If you decide for the creation of a new form you get directly to the window of the form properties. If you want to educe a form from an existing one you get the possibility before to choose the accordant form. When educing from a form the fields are initialised and can be changed according to your requests. If you create a new form the fields are blank.
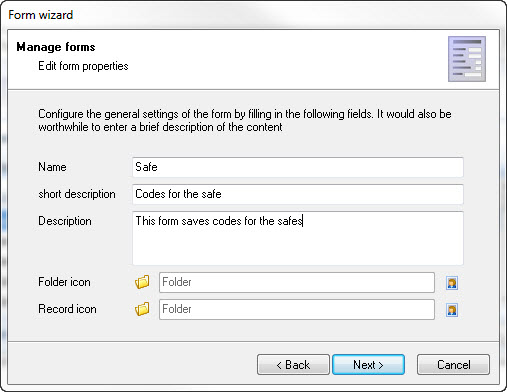
Here you have got the possibility to give the form a name and to describe it. Furthermore you can choose the icons for the linked folders and datasets here. In the next window you define the fields of the new form. The field description is contained by default.
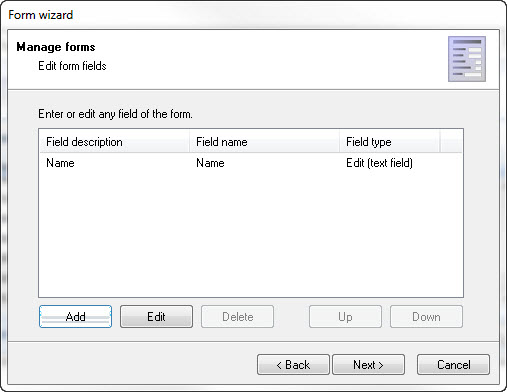
Via the push-button upwards and downwards you can change the order of the fields. Via the button add you have got the possibility to integrate new fields to the form.
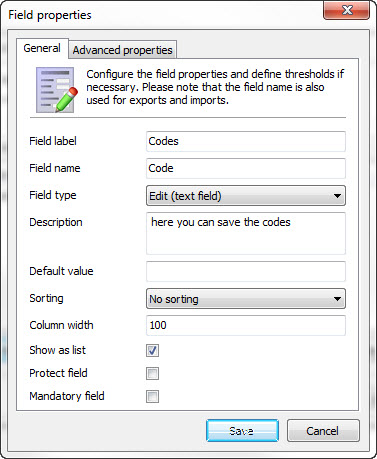
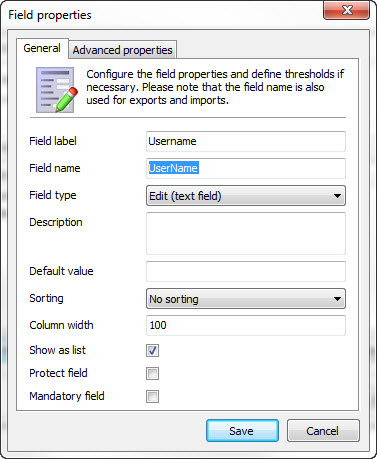
In the field properties you can define which kind of field it should be. You have got a selection of several types of fields here. The field name is a clear allocation and can only appear once in a form. The field name furthermore serves for the identification of the field, for example at the applications, and scripts as variable name {FRM:field name}.
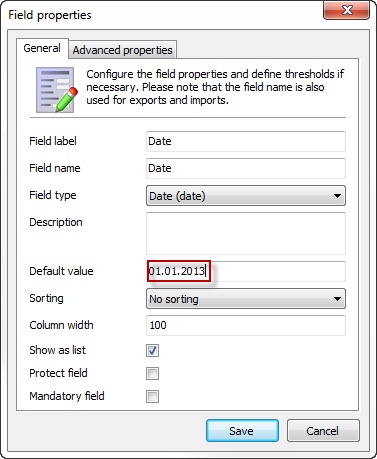
You can preset the corresponding fields under Default values for all records that have been created with a form. Naturally, the fields can be also changed or extended at a later point in time.
For example, it is possible to enter a fixed date for date fields. Please note here that the date format must correspond to the format used by the operating system.
"UserName" Fields can be filled with two variables:
{CurrentWindowsUser} |
The field will be filled with the logged on windows user |
{CurrentDomainWindowsUser} |
The field will be filled with the logged on windows user including the domain |
Date fields can be filled with the following variables:
[Today] |
Issues the current date |
[Today+365] |
Issues the current date plus a fixed number of days ([Today+1] corresponds to tomorrow's date) |
[Today-365] |
Issues the current date minus a fixed number of days ([Today-1] corresponds to yesterday's date) |
Field label: Title of the field which is indicated in the record.
Field name: Name of the field, must always be clear.
Field type: Here you define the field type. Depending on the field type, there are different functions available:
Edit: Field type for texts of all kinds
Password: Field type for storing passwords. This field can be turned on and off.
Checkbox: Displays a box for checking (Yes / No).
Combobox: This draws a box with a selection list -> Caution, the order must not be changed, if data has already been entered.
Date: Field type for dates including calendar function.
Header: For displaying sub-headings.
Memo: Multiline text box.
Decimal: Field for decimal numbers, including a calculator function
Number: field type for all numbers. Entering text is not possible.
All field types have a feature to take the content into the clipboard.
Description: In the field "description" you can deposit information which is displayed when editing a dataset. For this there are several possibilities:
Description text without icon entry
Just enter a text, this will then be displayed as an information as follows.
![]()
Description text with icon entry
You can also define the icon itself and therefore also change the color of the notice in order to get more attention on the description text. First enter the number of the icon (0 to 3) followed by a semicolon; and afterwards the text that should be displayed.
Information (blue)
0;Describe briefly for what this password is used.
![]()
Tip (yellow)
1;As a user name also the email address can be used.
![]()
Warning (bright red)
2;ATTENTION! Give away a safe password with at least 15 characters.
![]()
Error (dark red)
3;The field should no longer be used.
![]()
Description of the extended field properties
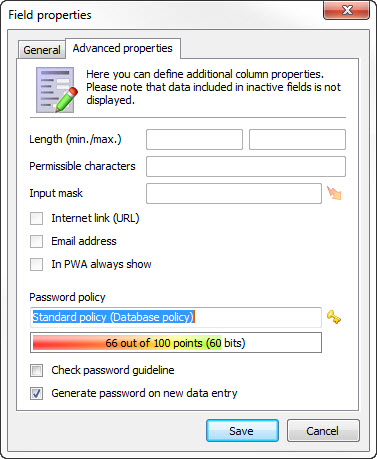
Length (min./max.) Define the minimum and the maximum length of the passwords here.
Allowed symbols If specifications are set here, only the entered symbols can be used for a password.
Entry mask: Here a set phrase, a "regular expression" can be deposited for a check.
Internet link (URL) If this option is activated, the entry appears as a link and can be activated directly.
Email address Here it can be stated if it is about an email address.
In PWA always show (only in server databases) If this is activated the field will be shown in a Password Safe WebAccess search always. Also wen there´s no search result.
Password guideline: With this option it is made sure that the entered password fulfills the password guidelines. Select an already created guideline here via a click on the key symbol.
Check password guideline: This option causes that newly created passwords have to accord the guideline.
Generate password at new capture: If this option is activated, Password Safe automatically creates a new password according to the password guideline, when a new dataset is started.
After you have saved your settings and completed the assistant the new form is available for you.